



How to Harvest Honey From a Beehive: A Beginner’s Guide🐝🍯

Harvesting honey is one of the most exciting moments for every beekeeper. After months of caring for your bees, watching them collect nectar, build comb, and store honey, collecting your first jars of fresh honey can be a truly rewarding experience.🌻
However, successful honey harvesting requires the right timing, proper tools, and gentle techniques. For beginners, learning the basic steps can help you collect honey while keeping your bee colony healthy.
🗓️ When Is the Best Time to Harvest Honey?
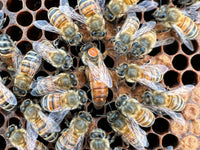
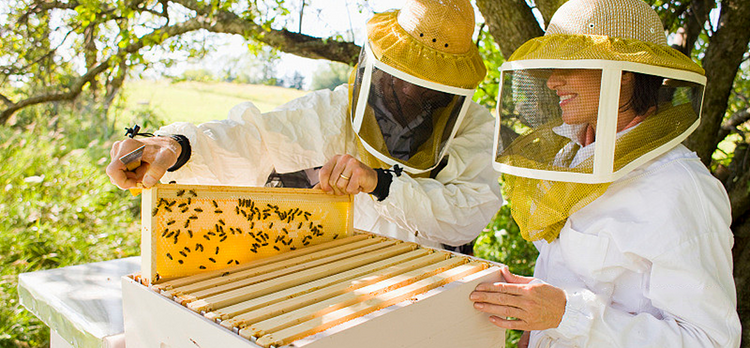
The best time to harvest honey is when the honey frames are fully capped. Bees naturally cover mature honey with a thin layer of beeswax, showing that the honey has reached the proper moisture level and is ready to be stored.
In general, honey harvesting usually happens:
· 🌸Late spring to early summer: After the first major nectar flow.
· 🌻Mid to late summer: A common harvest period in many regions.
· 🍂Early fall: The final harvest before preparing colonies for winter.
The exact timing depends on:
· Local climate
· Available flowers and nectar sources
· Weather conditions
· Bee colony strength
⚠️ Avoid harvesting too early. Uncapped honey may contain too much moisture and can ferment during storage.
A good sign that honey is ready is when most of the cells on the frame are sealed with a wax cap.
🧰 Tools Needed for Honey Harvesting
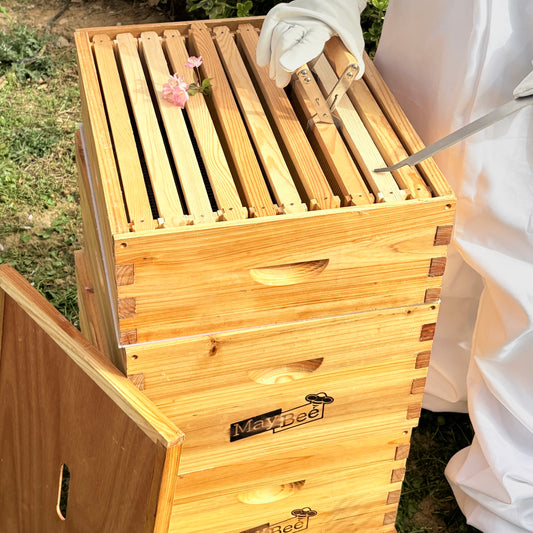
Before opening your hive, prepare all the necessary equipment. Having the right tools makes harvesting easier and reduces stress for both you and your bees.
Essential honey harvesting tools include:
|
Tool |
Purpose |
|
🌫️Bee smoker |
Helps calm bees during hive inspection |
|
🥼Protective clothing |
Protects you from bee stings |
|
🔧Hive tool |
Helps remove frames and separate hive boxes |
|
🖌️Bee brush |
Gently removes bees from frames |
|
🔪Uncapping knife or fork |
Removes wax caps from honey cells |
|
⚙️Honey extractor |
Removes honey while preserving comb |
|
🍯Food-safe containers |
Stores freshly harvested honey |
For beginners, a simple setup is usually enough. As your beekeeping experience grows, you can invest in more advanced equipment.
🔍 Step 1: Inspect the Hive Before Harvesting
Before removing honey frames, carefully inspect your hive.
Make sure:
✅ The colony is healthy
✅ The hive has enough honey reserves left for the bees
✅ The honey frames are mostly capped
Never remove all the honey from a hive. Bees need stored honey to survive periods when food is unavailable, especially during winter or bad weather.
Choose frames that contain mostly capped honey, as these are the best frames for harvesting.
🐝 Step 2: Remove Bees From Honey Frames
After selecting the honey frames, gently remove the bees.
Common methods include:
· 🖌️Bee brush: Slowly brush bees off the frame.
· 🚪Bee escape board: Allows bees to leave the honey super.
· 💨Bee blower: Often used by larger beekeeping operations.
When handling frames:
· Move slowly and carefully.
· Avoid shaking frames too hard.
· Try not to damage the honeycomb.
Gentle handling keeps the colony calmer and protects the valuable comb structure.
🍯 Step 3: Uncap the Honeycomb
Once the honey frames are removed, the next step is uncapping.
The wax caps are the thin layer of beeswax that seals each honey cell.
How to uncap honey frames:
1. Place the frame above an uncapping tray or clean container.
2. Use an uncapping knife or fork to remove the wax caps.
3. Keep as much comb structure intact as possible.
Preserving the comb is beneficial because bees can reuse it, saving energy and allowing them to produce honey more efficiently in the future.🐝
🔧 Step 4: Extract Honey From the Frames
Most backyard beekeepers use a honey extractor to remove honey from frames.
The process is simple:
1. Place uncapped frames into the extractor.
2. Spin the frames to remove honey using centrifugal force.
3. Collect the honey from the extractor.
4. Filter the honey to remove small pieces of wax.
The empty frames can usually be returned to the hive, allowing bees to refill the comb instead of rebuilding it from scratch.🔄
✅ Step 5: Store Your Fresh Honey Properly
After extraction, store honey in clean, food-safe containers.
Tips for storing honey:
· 🍯Use glass jars or food-grade containers.
· 🌡️Keep honey in a cool, dry place.
· ☀️Avoid direct sunlight.
· 💧Keep moisture away from the container.
Honey can last for many years when stored properly because of its natural preservation properties.
The final flavor, color, and texture of your honey will depend on the flowers your bees visited. Different nectar sources create different types of honey, making every harvest unique.🌻
🛠️ Recommended Beekeeping Tools for Beginners
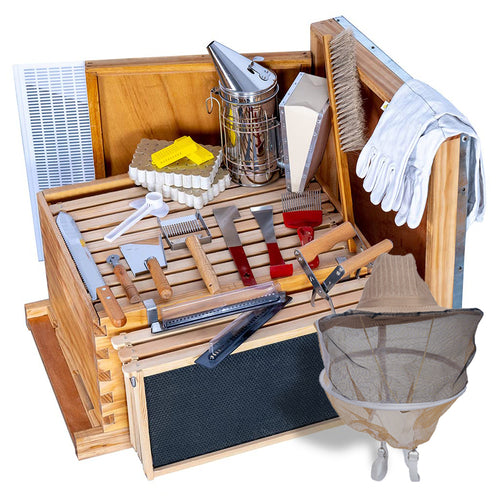
Having the right tools can make honey harvesting easier and more enjoyable, especially for beginner beekeepers. A basic beekeeping tool kit usually includes essential equipment for hive inspections, colony management, and honey harvesting.
For those who are just starting their beekeeping journey, the MayBee Hives Beekeeping Supplies Bee Keeper Starting Kit provides a convenient collection of essential tools in one package. It includes practical beekeeping supplies such as a bee smoker, hive tools, and other accessories needed for daily hive care.
A complete starter kit can help beginners:
· 🐝Inspect hives more safely
· 🔧Handle frames and hive components more easily
· 🌫️Calm bees during hive inspections
· 🍯Prepare for future honey harvesting
Choosing reliable tools from the beginning allows beekeepers to spend more time caring for their colonies and enjoying the beekeeping experience.
🌟 Final Thoughts
Harvesting honey requires patience, preparation, and careful hive management. By following the correct steps, beekeepers can collect high-quality honey while keeping their colonies healthy.
With the right tools and knowledge, harvesting honey becomes one of the most enjoyable parts of beekeeping.